
10.2 Three Methods to Handle Events
There are three main methods to handle events.
10.2.1 Inline Event Handler
The first method is to use an inline event handler in our HTML code. We do that by assigning a function to an HTML attribute.
First, let’s create two new files in Brackets and name them EventsPractice.html and chap10.js. Add the following code to EventsPractice.html:
<html>
    <head>
        <title>Events Practice</title>
    </head>
    <body>
        <form>
            <input type = "button" name = "button1" value = "Inline Handler Demo"><br><br>
            <input type = "button" id = "propdemo" name = "button2" value = "Event Handler Property Demo"><br><br>
            <input type = "button" id = "listenerdemo" name = "button3" value = "Event Listener Demo">
        </form>
        <script type="text/javascript" src="chap10.js"></script>
    </body>
</html>
This code adds three buttons to our HTML page and links chap10.js to the page.
We are going to use the first button to demonstrate an inline event handler.
Change the first <input> tag to
<input type = "button" name = "button1" value = "Inline Handler Demo" onclick = "eventHandlerInlineDemo();">
In the statement above, we added an onclick attribute to the tag and assigned a function called eventHandlerInlineDemo() to the attribute.
Next, let’s add the eventHandlerInlineDemo() function to chap10.js.
function eventHandlerInlineDemo(){
    alert("Inline Event Handler");
}
This function simply calls another function – alert().
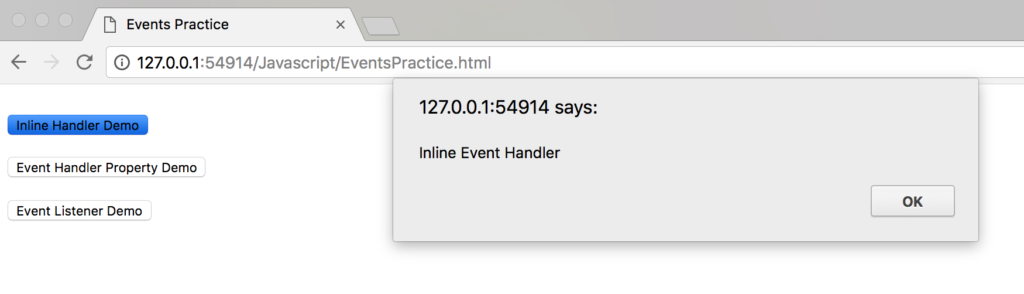
alert() is a built-in javascript function that pops up a window with a specified message and an OK button. We pass in the string "Inline Event Handler" to the alert() function.
To run this code, save chap10.js and refresh EventsPractice.html. Next, click on the first button. You’ll see a pop-up box with the message 'Inline Event Handler'. Click OK to dismiss the box.
That’s it. As you can see, using inline handler is rather straightforward, we simply assign a function to the relevant HTML attribute.
However, note that it is generally considered bad programming practice to use inline event handlers. This is because you are mixing Javascript code with HTML code which can make your code difficult to debug and maintain.
Rather than using inline event handlers, you are encouraged to use one of the two methods below to handle events instead.
10.2.2 Using Event Handler Properties
The second method to handle events is to use event handler properties. To do that, we assign a function to the relevant property of the element. For instance, let’s see how we can handle a click event for the second button.
First, add the following functions to chap10.js:
function eventHandlerPropDemo(){
    alert("Event Handler Property");
}

function eventHandlerPropDemo2(){
    alert("Event Handler Property 2");
}
Next, we’ll use the first function to handle our click. To do that, we need to assign the function to the onclick property as shown below:
document.getElementById("propdemo").onclick = eventHandlerPropDemo;
Add the statement above to chap10.js.
Note that we do not add parenthesis after the function name. This is because we are not calling the function yet (adding parenthesis will invoke the function immediately), we are simply assigning it to the onclick property. The function will only be called when the user clicks on the button.
To run the code, save chap10.js and refresh EventsPractice.html. Click on the second button. You’ll see a window pop up with the message "Event Handler Property".
Once again, using event handler properties is pretty straightforward. This method is better than the first method. However, it has one limitation: We cannot assign two functions to the same property. If we try to do that, the second statement will override the first. Try adding
document.getElementById("propdemo").onclick = eventHandlerPropDemo2;
to chap10.js (below the previous statement) and run the program again. When you click on the second button, you’ll see that only the second function is executed. This is because the second statement has overridden the first.
If we want to assign more than one function to an event, we need to use event listeners. Let’s learn how to do that now.
10.2.3 Using Event Listeners
To understand how event listeners work, add the following code to chap10.js:
function eventListenerDemo(){
    alert("Event Listener");
}

function eventListenerDemo2(){
    alert("Event Listener 2");
}
Here, we add two functions (eventListenerDemo and eventListenerDemo2) to our script. Next, let us add an event listener to our third button. An event listener is a built-in function in Javascript that waits for an event to occur and reacts accordingly.
Add the following code to chap10.js to see this at work:
document.getElementById("listenerdemo").addEventListener('click', eventListenerDemo);
The event listener function is called addEventListener(). It takes in two arguments – the event to respond to and the function to invoke when that event occurs. In our example, the event to listen to is 'click'.
The second argument tells the listener what to do when a 'click' event occurs. In our example, we want it to call the eventListenerDemo() function.
Save chap10.js and refresh EventsPractice.html. Click on the third button. You’ll see a pop-up window with the message "Event Listener".
Using an event listener allows us to add more than one function to the event. Add the following line to chap10.js and run the program again:
document.getElementById("listenerdemo").addEventListener('click', eventListenerDemo2);
You’ll see that both the eventListenerDemo() and eventListenerDemo2() functions are called (one after another).
Using event listeners is the preferred method to handle events as it is more flexible. However, note that it is not supported by older versions of Internet Explorer. If you are developing for older browsers, you may want to stick with the previous method instead.