
4.2 Control Flow Statements
Now that we are familiar with the different comparison operators, we are ready to look at various control flow statements in Javascript. The first is the if statement.
4.2.1 If Statement
The if statement is one of the most commonly used control flow statements; it allows the program to evaluate if a certain condition is met, and to perform the appropriate action based on the result of the evaluation. The structure of an if statement is as follows:
if (condition 1 is met) {
do A;
} else if (condition 2 is met) {
do B;
} else if (condition 3 is met) {
do C;
} else {
do D;
}
You can have as many else if blocks as you like. In addition, else if and else blocks are optional; you can leave them out if you do not have alternative tasks for the program to perform when condition 1 is not met.
To fully understand how the if statement works, add the following code to chap4.js.
var input = prompt("Please enter a number: ");

if (input === '0')
{
    console.log("Hello");
    console.log("You entered 0");
}
else if (input > 0)
{
    console.log("You entered a positive number");
}
else if (input < 0)
    console.log("You entered a negative number");
else
{
    console.log("You did not enter a number")
}
The program first prompts the user for an input using the prompt() method. The prompt() method is a built-in Javascript method that displays a dialog box prompting the user for input. This input is returned as a string. If the user clicks "Cancel", a special value called null is returned. If the user clicks OK without entering any text, an empty string, represented as " (two single quotes) or "" (two double quotes), is returned.
The prompt() method takes in two arguments. The first argument is the prompt message in the form of a string. In our code, the prompt message is "Please enter a number: ". The second argument is the default input text that will be prefilled in the box.
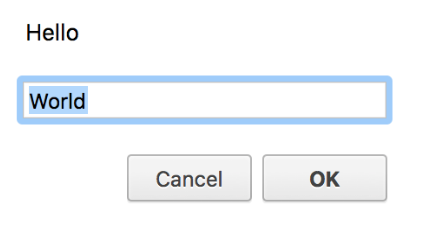
For instance, if you write prompt("Hello", "World"); you’ll get the dialogue box below.
The second argument is optional. In our example, we did not provide any value for this argument. After we prompt users for an input, we store this result in a variable called input.
Next the statement
if (input === '0')
compares the input variable with the string '0'.
If the value stored in input is '0', the program will execute all statements that are included in the pair of curly braces { } that follows (lines 4 to 7).
Code enclosed in a set of braces is referred to as a block of code.
In this example, the program will display "Hello" and "You entered 0" in the console window.
Alternatively, if the value stored in input is greater than zero, the program will display "You entered a positive number" (lines 9 to 11).
If the value stored is smaller than zero, the program will display "You entered a negative number" (line 13). You may notice that we did not enclose the statement console.log("You entered a negative number"); in curly braces. This is because curly braces are optional if there is only one statement to execute.
For all other values, the program will print "You did not enter a number".
Run the program four times (by refreshing your browser), and enter 0, 1, -3 and abc respectively for each run. You’ll get the following output in the console window:
Please enter 1, 2 or 3: 0
Hello
You entered 0
Please enter 1, 2 or 3: 1
You entered a positive number
Please enter 1, 2 or 3: -3
You entered a negative number
Please enter 1, 2 or 3: abc
You did not enter a number
Note that in the example above, we use a single line for each opening and closing brace (e.g. lines 4 and 7). That was done mainly to improve readability when explaining the concept of a code block. It is more common for us to use the format below:
if (input === '0') {
    console.log("Hello");
    console.log("You entered 0");
} else if (input > 0) {
    console.log("You entered a positive number");
}
This is the format that we’ll be using for the rest of the site.
4.2.2 Ternary Operator
 Next, let’s look at the ternary operator. The ternary operator is a special operator that works like an if statement. It is more convenient than an if statement if you only need to perform a simple task. The syntax is:
condition ? do task 1 : do task 2
For instance, add the following lines to chap4.js.
var num1;
var input2 = prompt("Please enter a letter: ");

num1 = (input2 === 'A'? 12 : 13);
console.log(num1);
In the example above, the ternary operator is used on the right side of line 4 (enclosed in brackets). The value 12 will be assigned to num1 if input2 === 'A'. Else, the value 13 will be assigned. We verify that by printing the value of num1 on line 5.
Another example is
console.log(input2 === 'A'? "This is task 1" : "This is task 2");
This statement displays "This is task 1" in the console window if input2 === 'A'. Else it displays "This is task 2".
Add the examples above to chap4.js and run the program again. Enter A when prompted to enter a letter. You should get the two additional output lines below:
12
This is task 1
4.2.3 Switch Statement
Next, let’s move on to the switch statement.
The switch statement is also similar to an if statement. It uses a variable for switching. Depending on the value of the variable, the program will execute the correct block of code.
The syntax of a switch statement is as follows:
switch (variable used for switching)
{
case firstCase:
do A;
break;
case secondCase:
do B;
break;
default:
do C;
break;
}
You can have as many cases as you want when using a switch statement. The default case is optional and is executed when no other case applies.
When a certain case is satisfied, everything starting from the next line is executed until a break statement is reached.
Let’s look at an example of how the switch statement works.
var grade = prompt("Enter your grade: ");

switch (grade) {
    case "A+":
    case "A":
        console.log("Distinction");
        break;
    case "B":
        console.log("B Grade");
        break;
    case "C":
        console.log("C Grade");
        break;
    default:
        console.log("Fail");
        break;
}
The program first prompts the user for his grade.
If grade is "A+" (line 4), the program executes the next statement until it reaches the break statement. This means it’ll execute lines 5 to 7. Thus the output is “Distinction”.
If grade is "A" (line 5), the program executes lines 6 and 7. Similarly, the output is “Distinction”.
If grade is not "A+" or "A", the program checks the next case. It keeps checking from top to bottom until a case is satisfied. If none of the cases applies, the default case is executed.
If you run the code above, you’ll get the following output for each of the input shown:
Enter your grade: A+
Distinction
Enter your grade: A
Distinction
Enter your grade: B
B Grade
Enter your grade: C
C Grade
Enter your grade: D
Fail
Enter your grade: Hello
Fail
In addition to checking a single value for each case, the switch statement can also evaluate more complex expressions. Let’s look at an example:
var marks = prompt("Please enter your marks: ");

switch (true) {
    case marks >= 75:
        console.log("Distinction");
        break;
    case marks >= 65:
        console.log("Good");
        break;
    case marks >= 50:
        console.log("Pass");
        break;
    default:
        console.log("Fail");
        break;
}
When we use the switch statement to evaluate an expression instead of evaluating a single value, we write switch(true) instead of switch (variable used for switching) (refer to line 3).
In the example above, we first prompt users to enter their marks. Next, we use the switch statement to evaluate different comparison expressions. Specifically, we check if marks fall within a certain range.
If marks is greater than or equal to 75, the first case is satisfied and the console displays “Distinction”. If the first case is not satisfied, the switch statement checks from top to bottom until a case is satisfied. If none of the cases applies, the default case is executed.
Add the code above to chap4.js and run it. Try entering different values when prompted to enter your marks. (You may want to delete or comment out the previous examples so that you do not get too many prompts.) For instance, try entering 69 and 78. You should get "Good" for the first case and "Distinction" for the second.
4.2.4 For loop
Next, let's move on to the for loop. This loop executes a block of code repeatedly until the test condition is no longer valid.
The syntax for a for loop is as follows:
for (initial value; test condition; modification to value)
{
//Do Some Task
}
To understand how the for loop works, let’s consider the example below.
var i;
for (i = 0; i < 5; i++) {
    console.log(i);
}
We first declare a variable called i. This variable serves as a loop counter. The main focus of the for loop is the second line:
for (i = 0; i < 5; i++)
There are three parts to it, each separated by a semi-colon.
The first part initializes the variable i to zero.
The second part tests if i is smaller than 5. If it is, the statements inside the curly braces will be executed. In this example, the curly braces are optional as there is only one statement.
After executing the console.log() statement, the program returns to the last segment in the second line.
i++ increments the value of i by 1. Hence, i is increased from 0 to 1.
After the increment, the program tests if the new value of i is still smaller than 5. If it is, it executes the console.log() statement again.
This process of testing and incrementing the loop counter is repeated until the condition i < 5 is no longer true. At this point, the program exits the for loop and continues to execute other commands after the for loop.
The output for the code segment is:
0
1
2
3
4
The output stops at 4 because when i is 5, the console.log() statement is not executed as 5 is not smaller than 5.
Besides using the for loop to repeatedly execute a block of code, the for loop is also commonly used to loop through an array. To do that, we use the length property of the array.
An example is shown below:
var myNumbers = [10, 20, 30, 40, 50];
var j;

for (j = 0; j < myNumbers.length; j++) {
    console.log(myNumbers[j]);
}
If we run the code, we’ll get the following output:
10
20
30
40
50
4.2.5 While Loop
The next loop to cover is the while loop. Like the name suggests, a while loop repeatedly executes instructions inside the loop while a certain condition remains valid.
The structure of a while loop is as follows:
while (condition is true)
{
do A
}
Let’s look at an example.
var counter = 5;
while (counter > 0) {
    console.log("Counter = " + counter);
    counter = counter - 1;
}
If you run the code, you’ll get the following output
Counter = 5
Counter = 4
Counter = 3
Counter = 2
Counter = 1
A while loop has a relatively simple syntax. The statements inside the curly braces are executed as long as the test condition (counter > 0) is valid.
Notice that we have the line counter = counter – 1 inside the curly braces? This line is crucial. It decreases the value of counter by 1 each time the loop is run.
We need to decrease the value of counter by 1 so that the test condition will eventually evaluate to false. If we forget to do that, the loop will keep running endlessly, resulting in an infinite loop. The program will keep printing counter = 5 until you somehow kill the program. Not a pleasant experience especially if you have a large program and you have no idea which code segment is causing the infinite loop.
4.2.6 Do while
The last loop is the do while loop. This loop is similar to the while loop with one main difference – the code within the curly braces of a do while loop is executed at least once. Here’s an example of how a do while loop works.
var counter = 100;
do {
    console.log("Counter = " + counter);
    counter++;
} while (counter<0);
As the test condition (while (counter<0)) is placed after the closing curly brace, it is tested after the code inside the curly braces is executed at least once.
If you run the code above, you will get
Counter = 100;
After the console.log() statement is executed for the first time, counter is incremented by 1. The value of counter is now 101. When the program reaches the test condition, the test fails as counter is not smaller than 0. The program will then exit the loop. Even though the original value of counter does not meet the test condition (counter < 0), the code inside the curly braces is still executed once. That's the main difference between a while and a do while loop.
Note that for a do while loop, a semi-colon (;) is required after the test condition.